Azure DevOpsのパイプラインからAppServiceへのデプロイ
はじめに
本記事では、マイクロソフトから提供されているサンプルWebアプリケーションを使って,Azure DevOpsでのリポジトリの作成~パイプラインの作成からAppServiceの デプロイを行うまでの一連の操作を記載する。
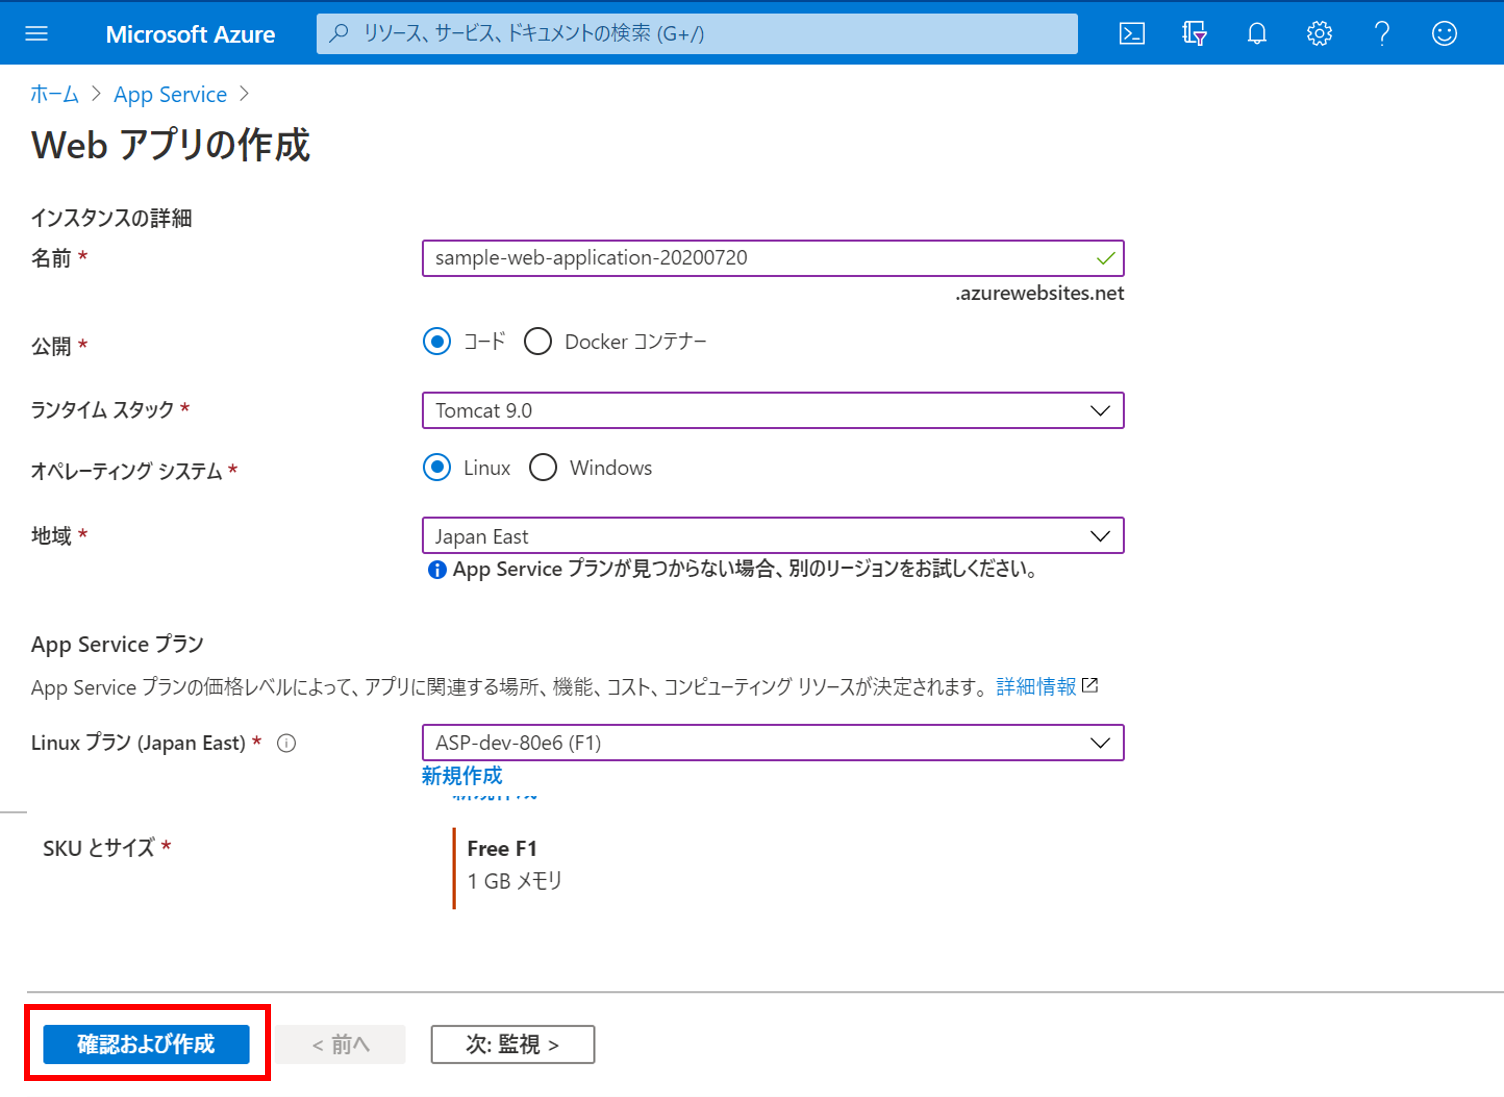
AppServiceにWebアプリケーションを作成
以下の手順で、Webアプリケーションを作成。
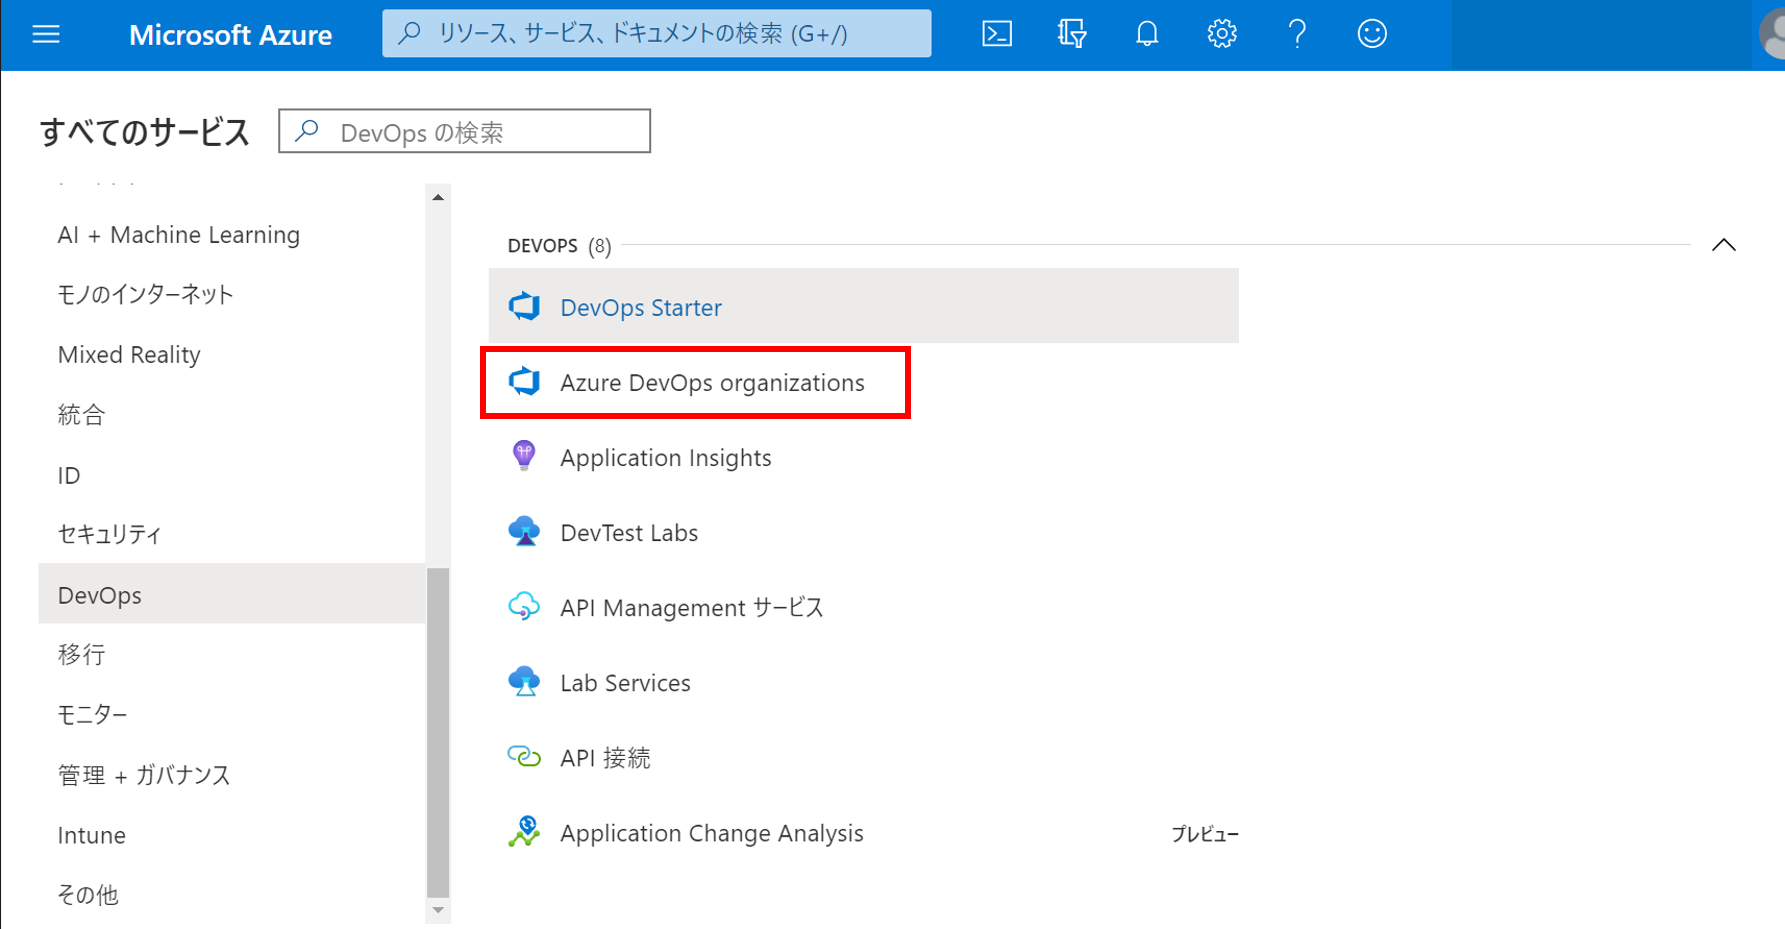
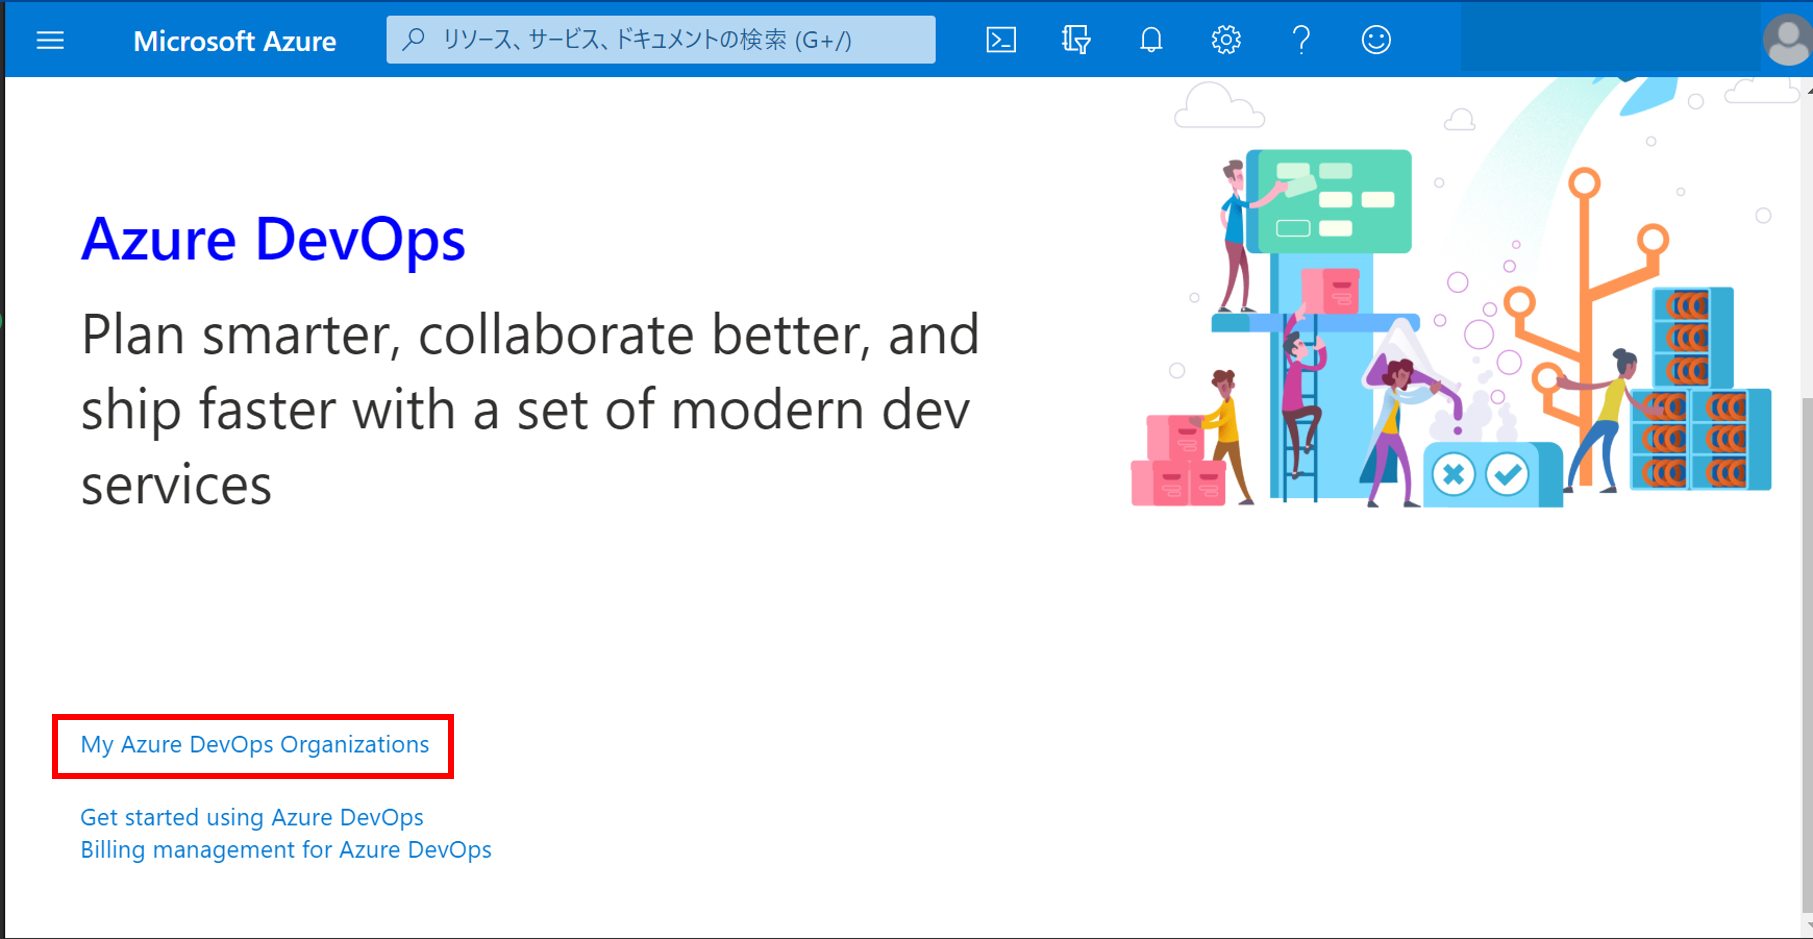
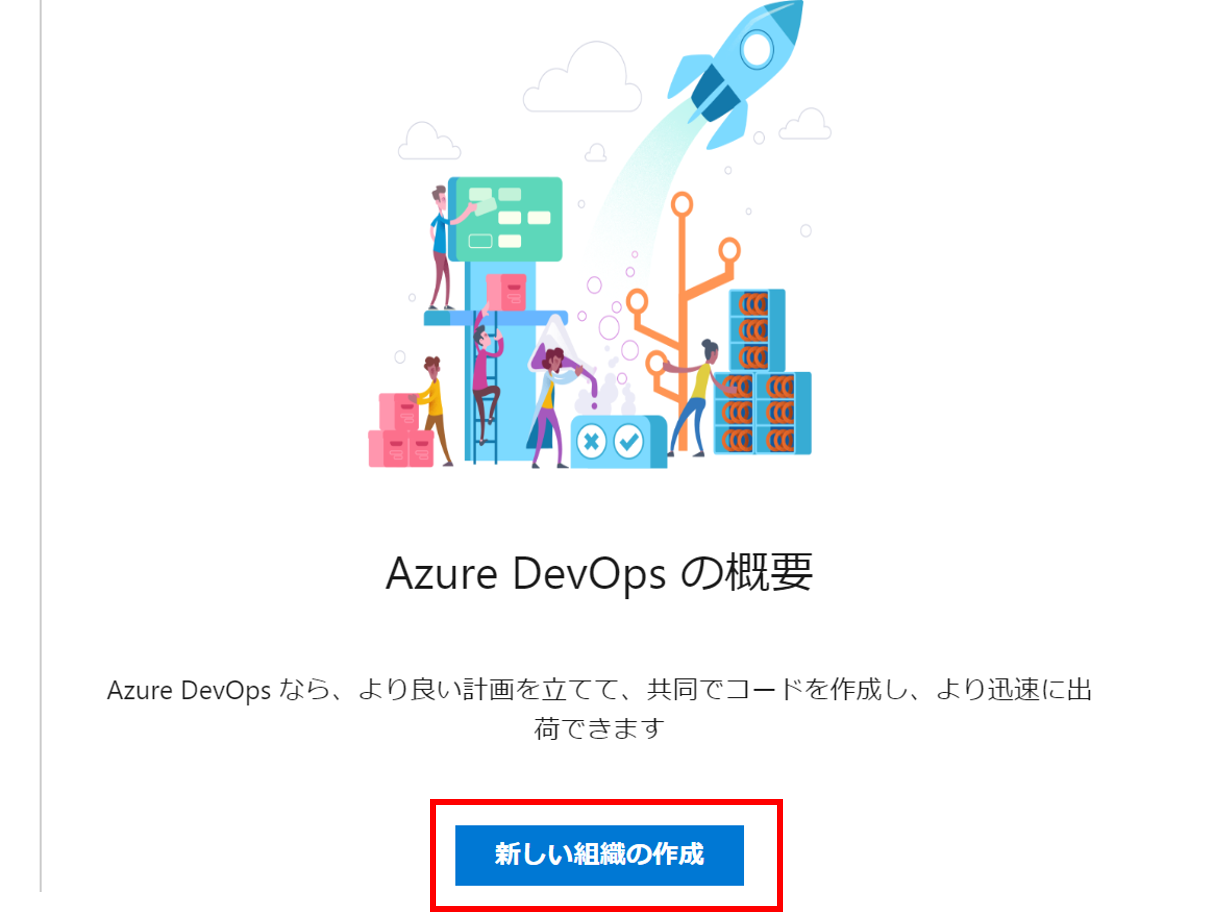
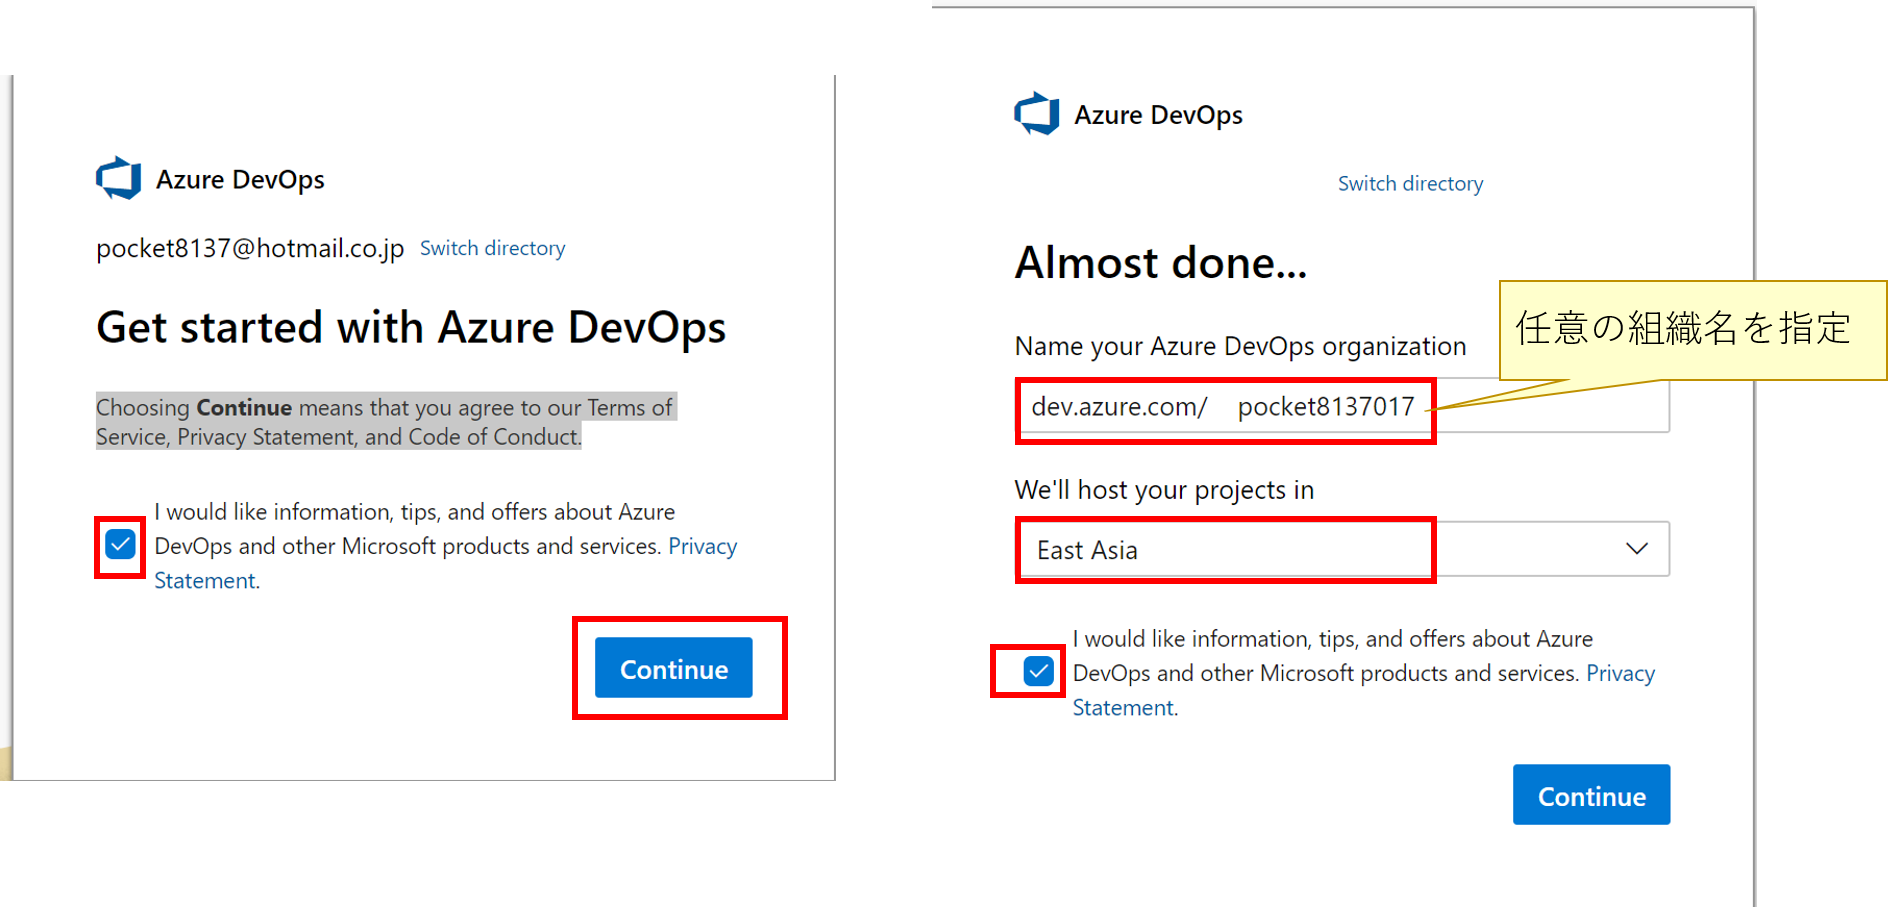
DebOpsで組織を作成
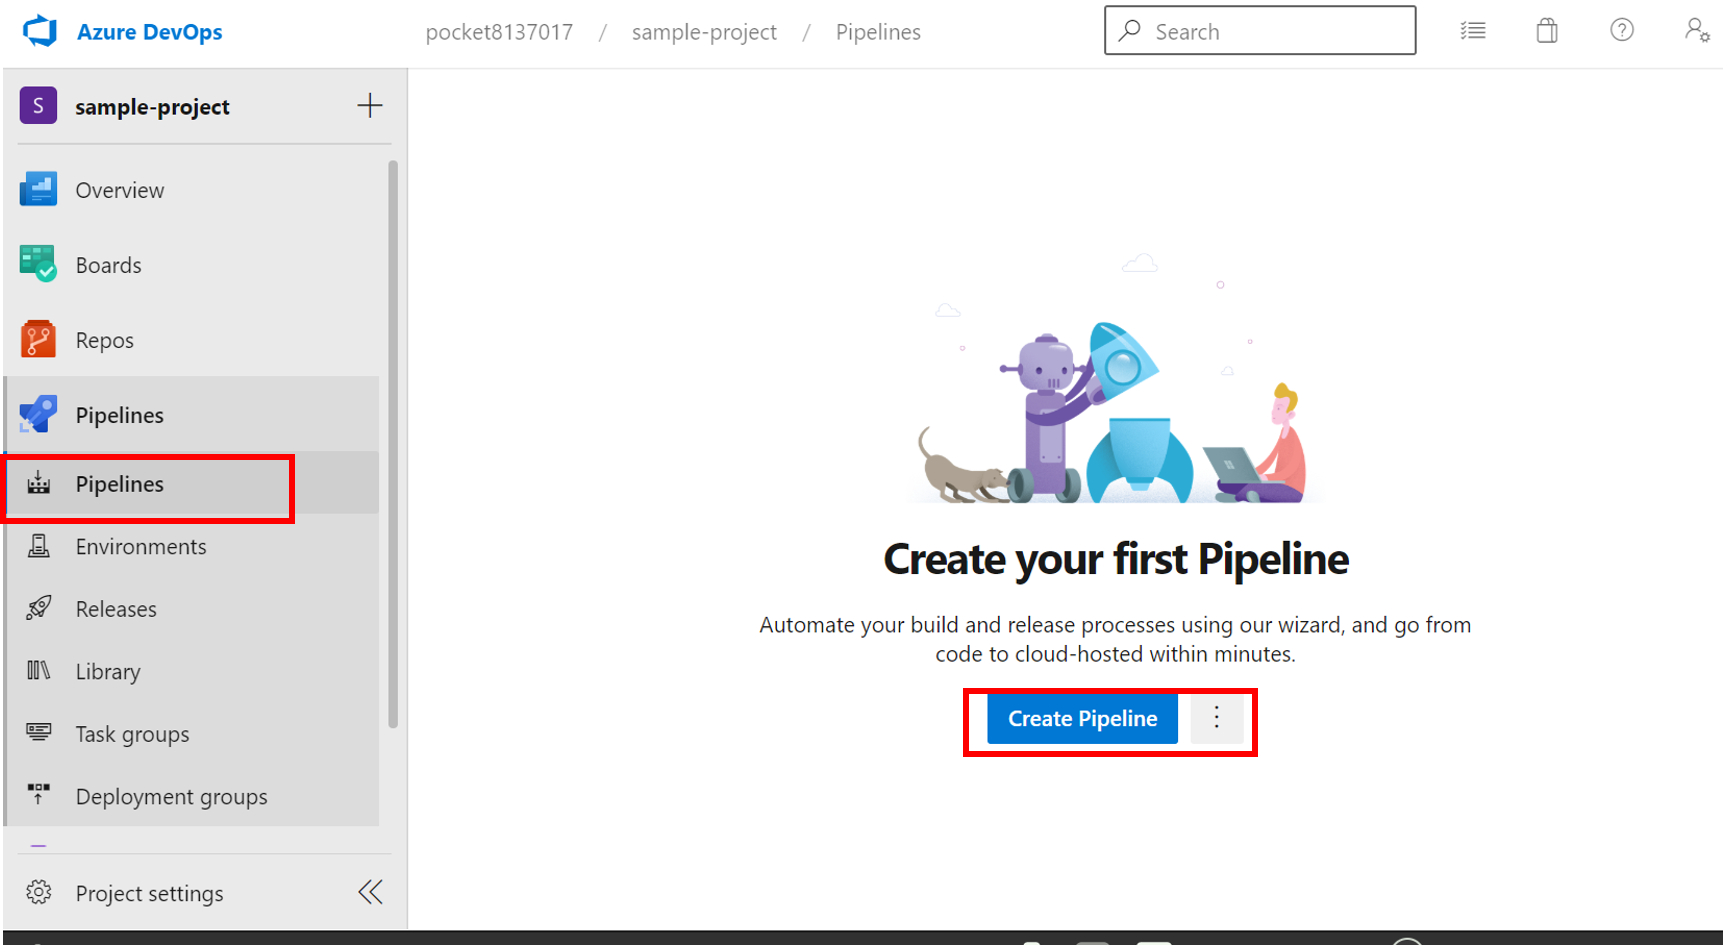
DevOps用のプロジェクトの作成

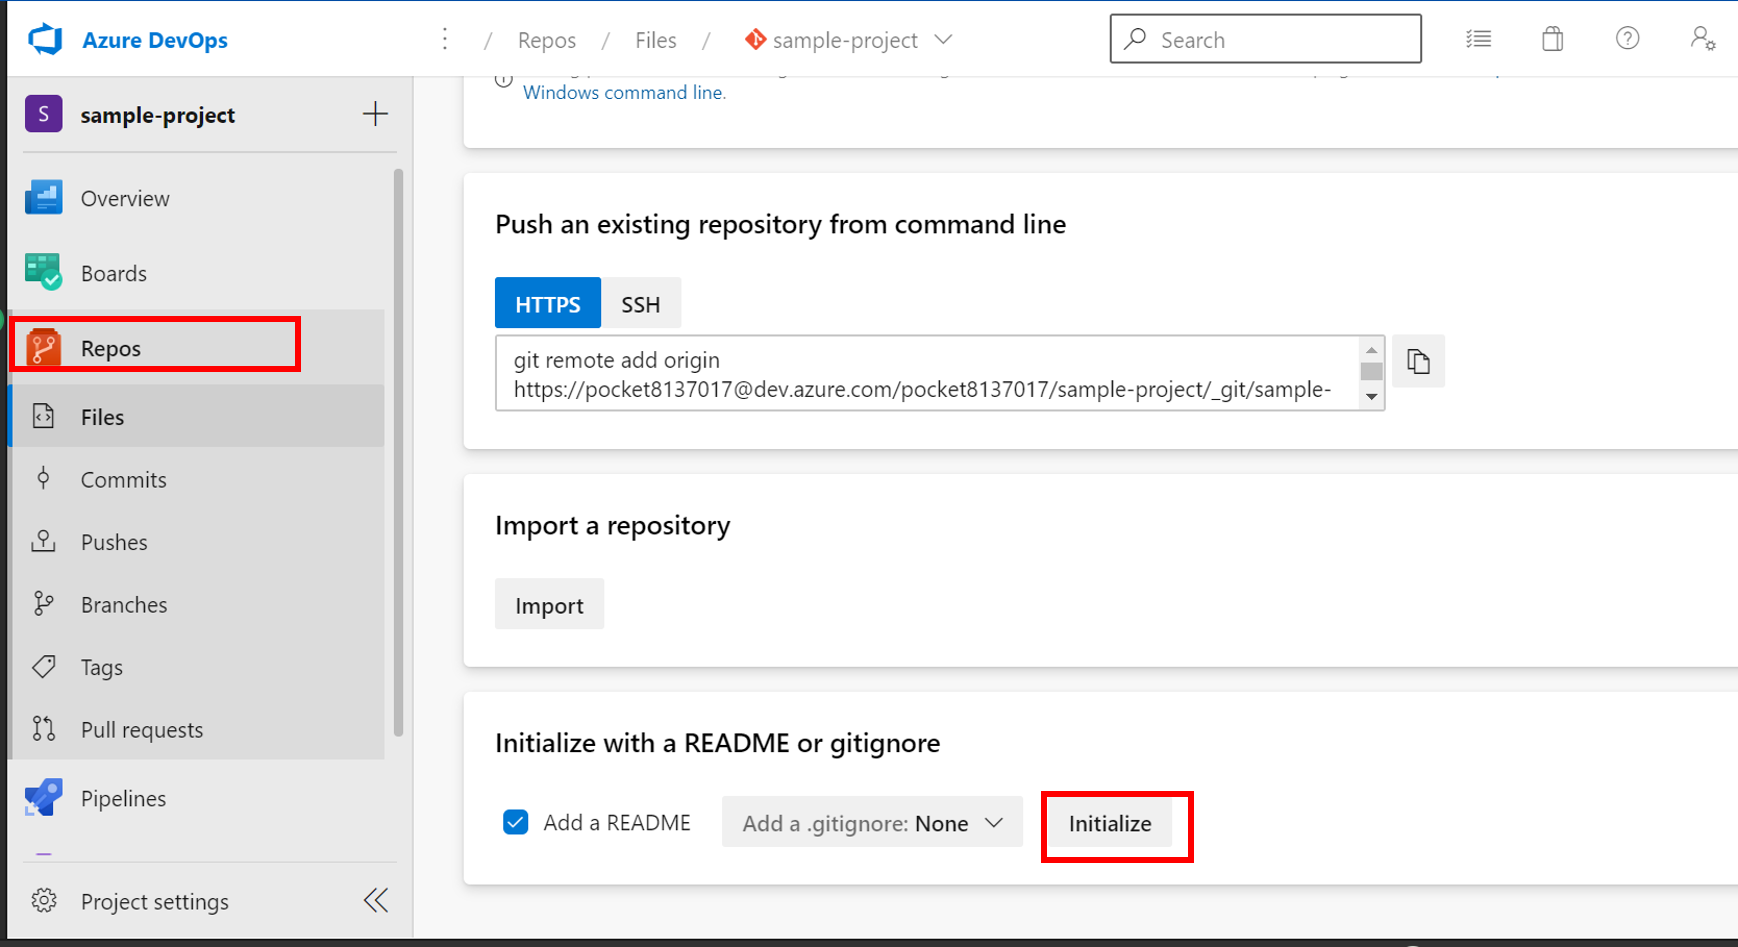
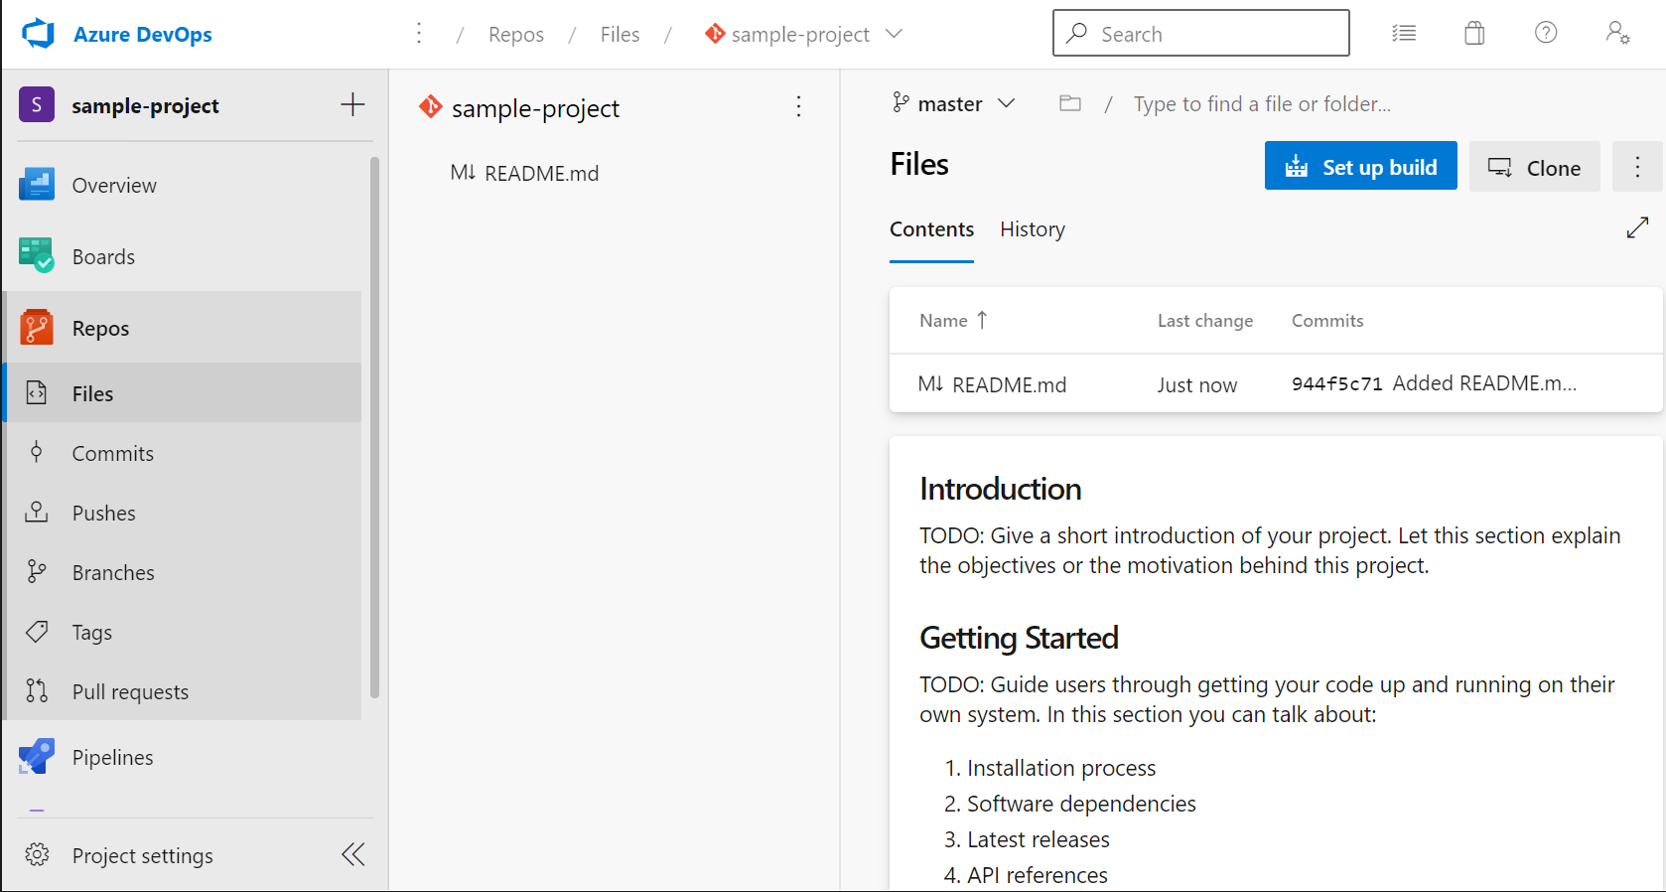
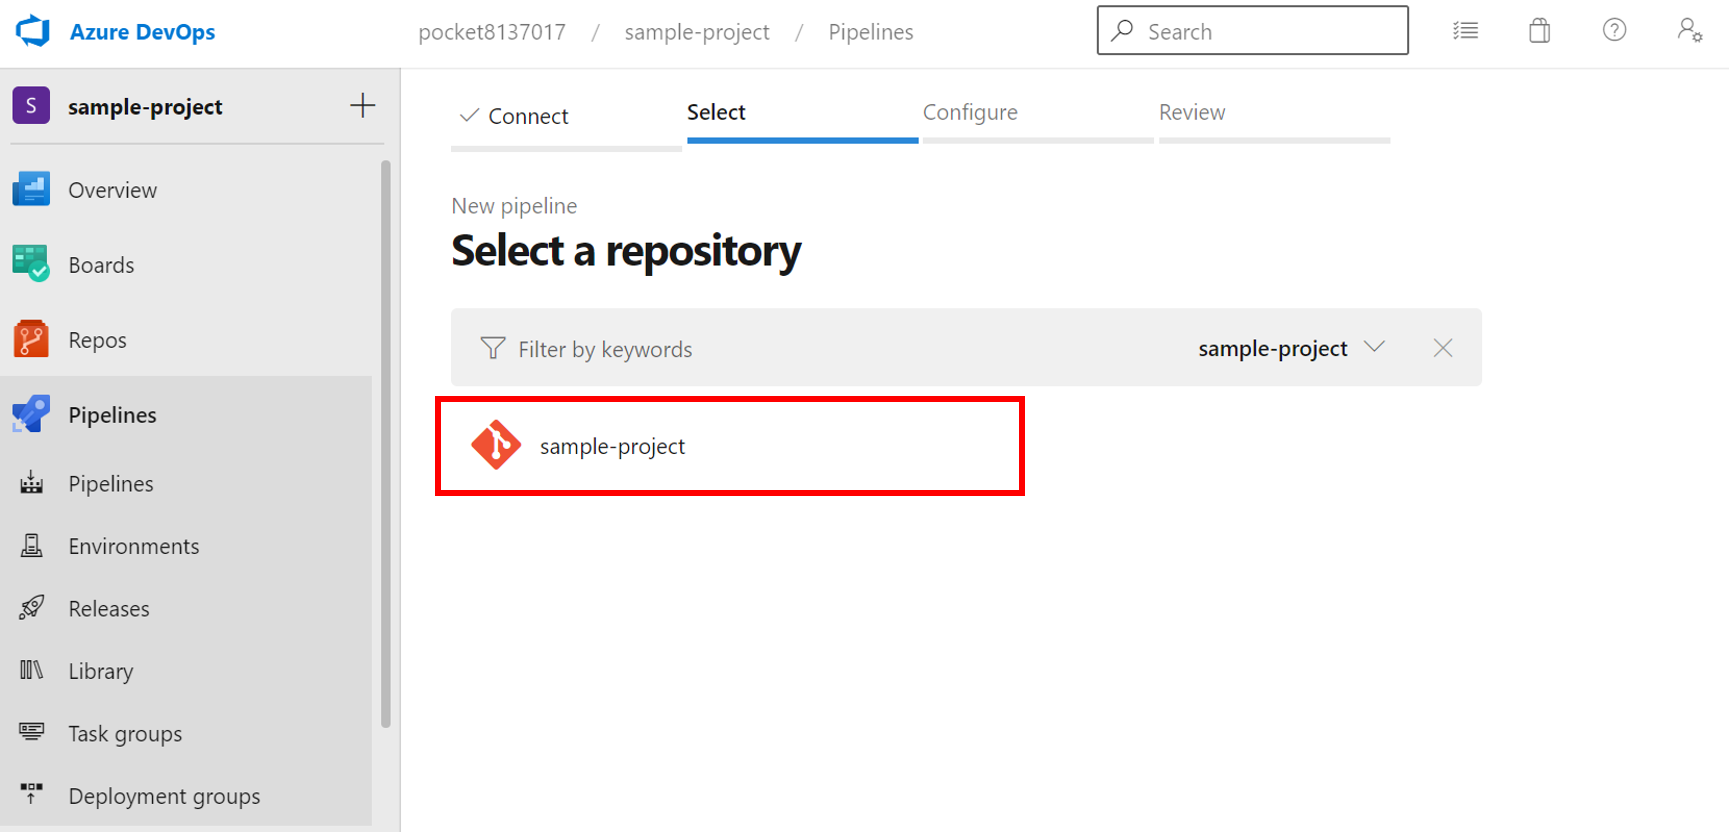
リポジトリの作成
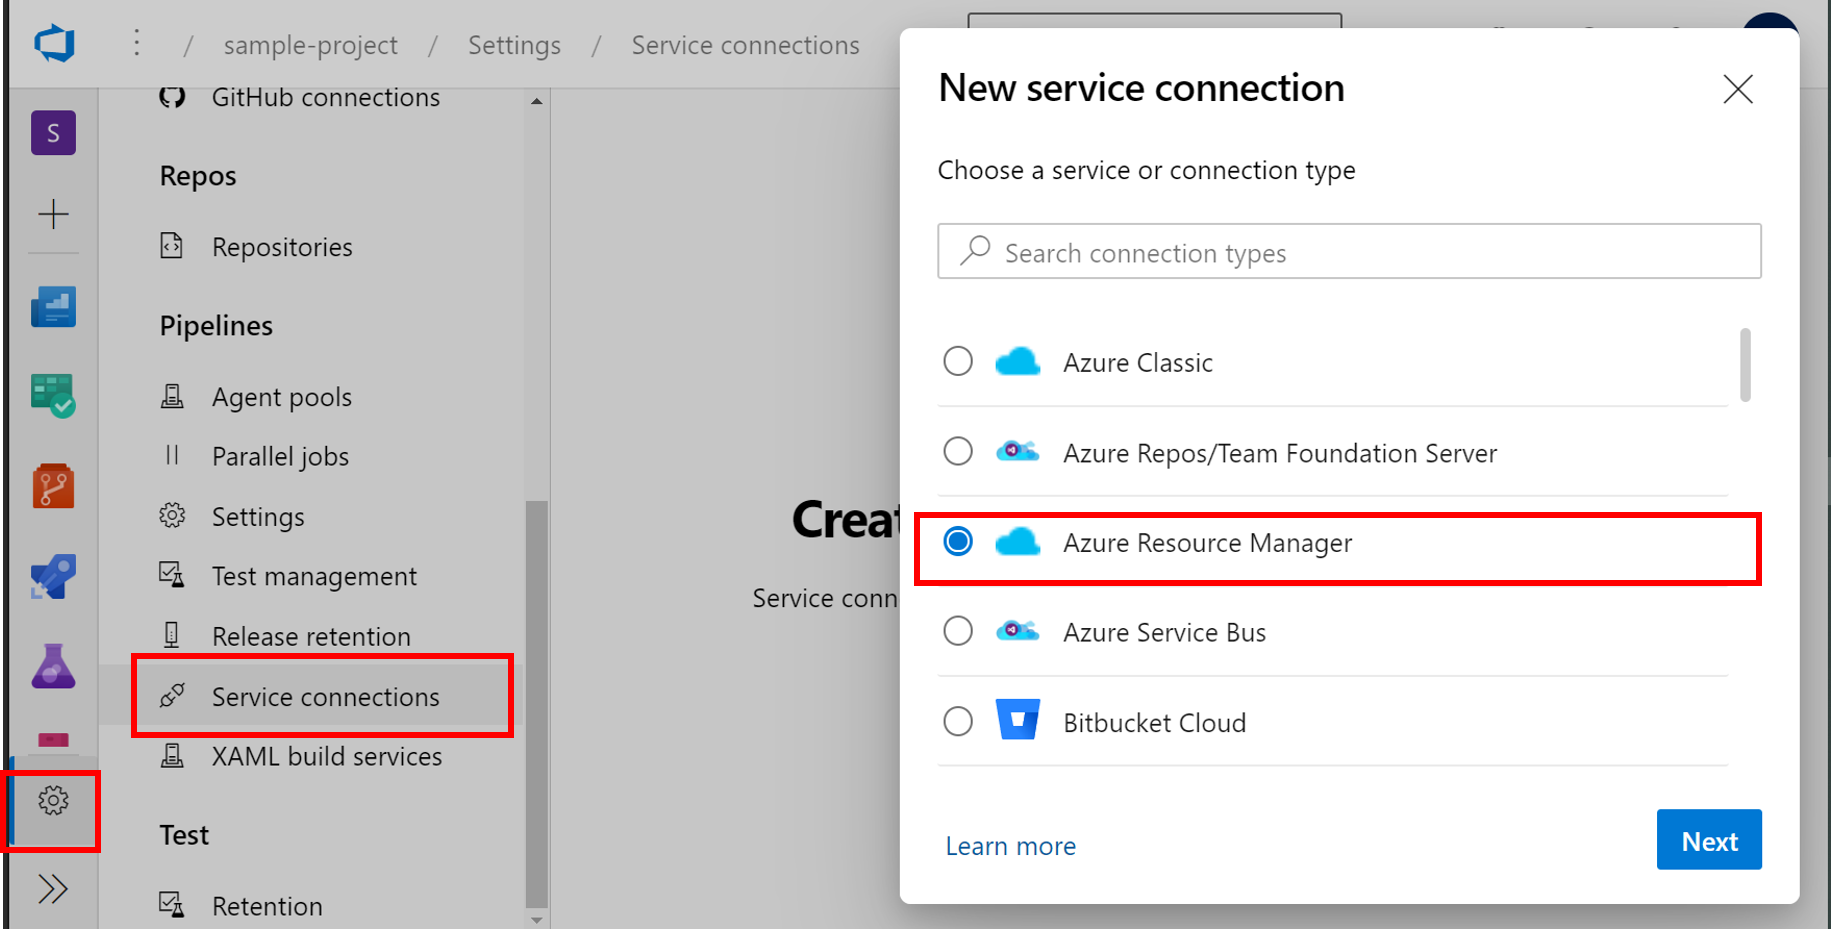
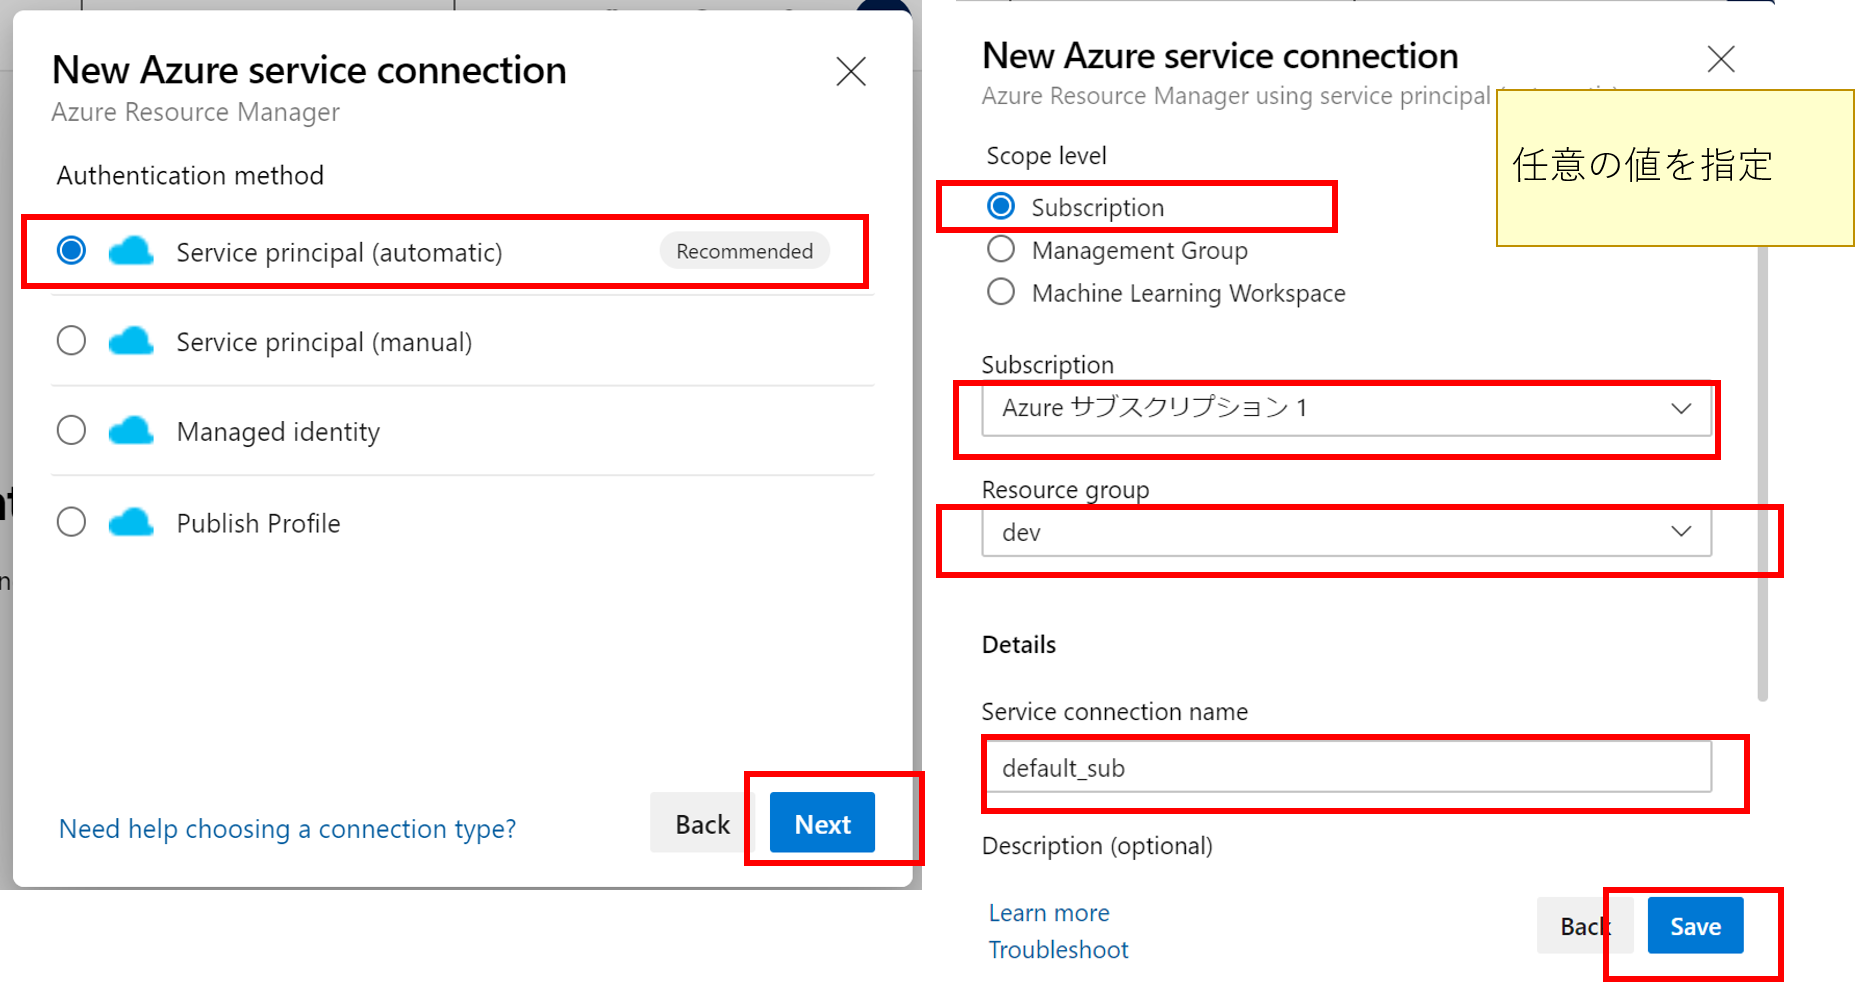
サービスコネクションを作成
サンプルプログラムを取得。
以下のサイトから、サンプルプログラムを取得してZIPダウンロードする。
先程クローンしたローカルリポジトリに展開する。
https://github.com/MicrosoftDocs/pipelines-java
コミットを行い、その後リモートリポジトリにPushする。
$ git add .
$ git commit -m "Sample WebAppを追加"
$ git push
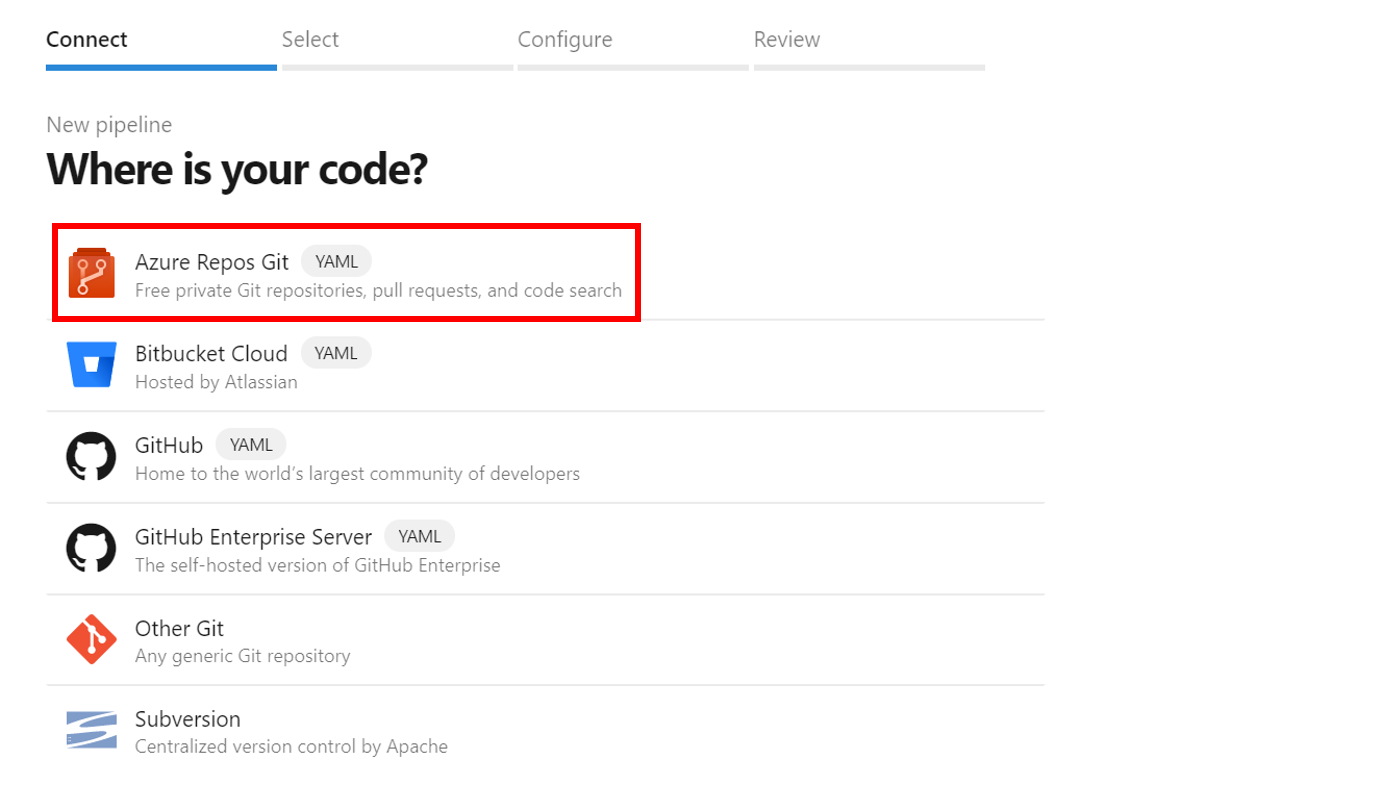
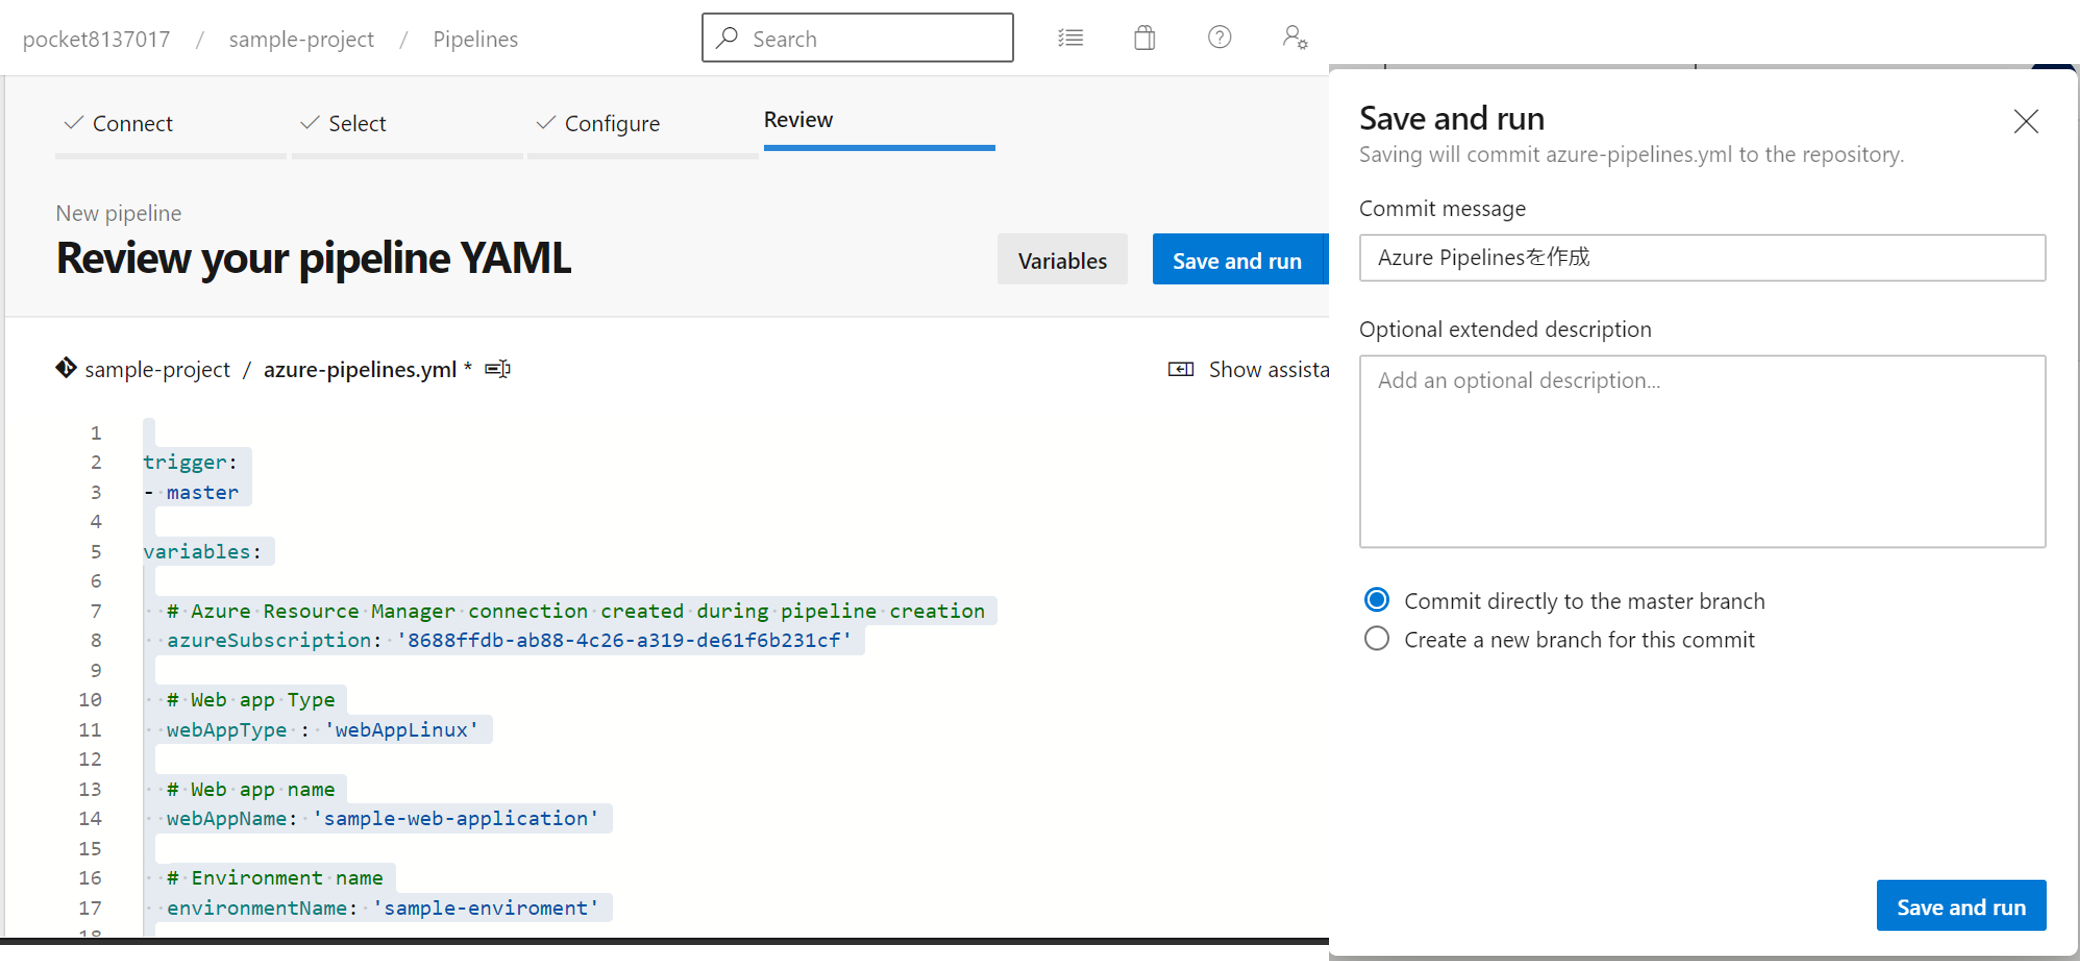
パイプラインYAML作成
以下のパイプラインを作成する。
trigger:
- master
variables:
# Azure Resource Manager connection created during pipeline creation
azureSubscription: '作成したサービスコネクション名を指定'
# Web app Type
webAppType : 'webAppLinux'
# Web app name
webAppName: 'sample-web-application'
# Environment name
environmentName: 'sample-enviroment'
# Agent VM image name
vmImageName: 'ubuntu-latest'
stages:
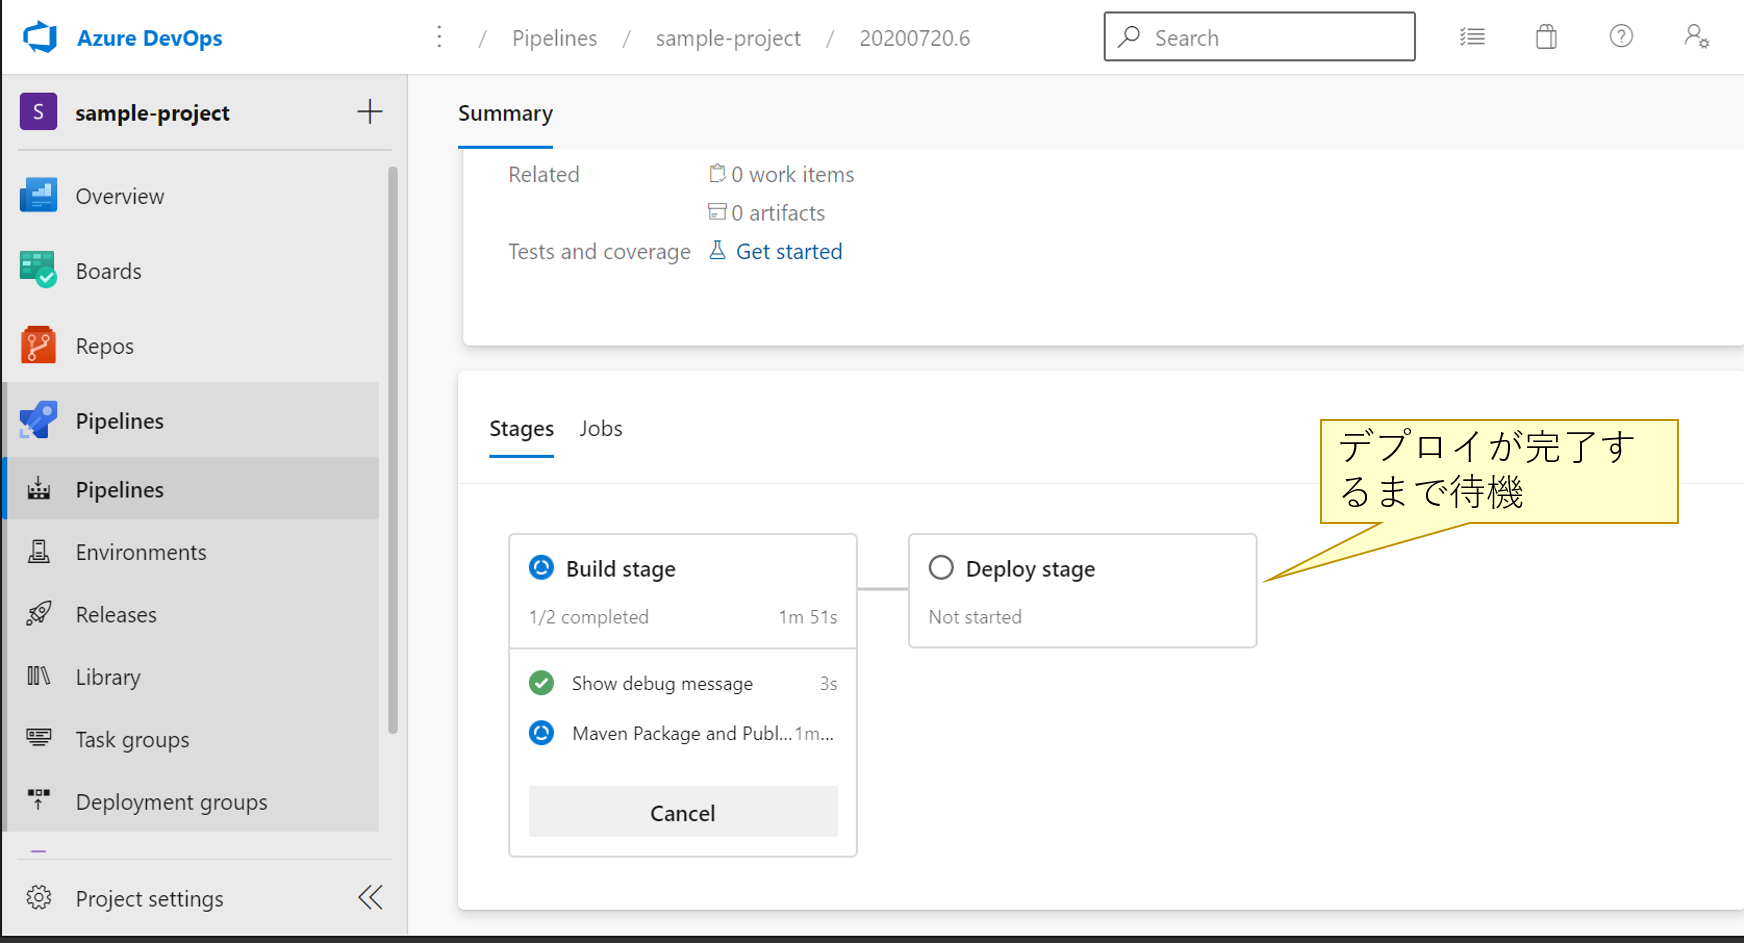
- stage: Build
displayName: 'Build stage'
jobs:
- job: Debug
displayName: 'Show debug message'
steps:
- script: |
echo "Subscription : $(azureSubscription)"
echo "Web App Name : $(webAppName)"
echo "Environment Name : $(environmentName)"
echo "Vm Image Name : $(vmImageName)"
echo "Pipeline Workspace Name : $(Pipeline.Workspace)"
echo "System Default Working directory : $(System.DefaultWorkingDirectory)"
echo "Artifact Staging Directory : $(Build.ArtifactStagingDirectory)"
- job: MavenPackageAndPublishArtifacts
displayName: 'Maven Package and Publish Artifacts'
pool:
vmImage: $(vmImageName)
steps:
- task: Maven@3
displayName: 'Maven Package'
inputs:
mavenPomFile: 'pom.xml'
mavenOptions: '-Xmx3072m'
javaHomeOption: 'JDKVersion'
jdkVersionOption: '1.11'
jdkArchitectureOption: 'x64'
publishJUnitResults: false
testResultsFiles: '**/TEST-*.xml'
goals: 'package'
- task: CopyFiles@2
displayName: 'Copy Files to artifact staging directory'
inputs:
SourceFolder: '$(System.DefaultWorkingDirectory)'
Contents: '**/target/*.?(war|jar)'
TargetFolder: $(Build.ArtifactStagingDirectory)
- upload: $(Build.ArtifactStagingDirectory)
artifact: drop
- stage: Deploy
displayName: 'Deploy stage'
dependsOn: Build
condition: succeeded()
jobs:
- deployment: DeployLinuxWebApp
displayName: 'Deploy Linux Web App'
environment: $(environmentName)
pool:
vmImage: $(vmImageName)
strategy:
runOnce:
deploy:
steps:
- task: AzureWebApp@1
displayName: 'Azure Web App Deploy'
inputs:
azureSubscription: $(azureSubscription)
appType: $(webAppType)
appName: $(webAppName)
package: '$(Pipeline.Workspace)/drop/**/target/*.?(war|jar)'

デプロイ後
AppServiceの「開発ツール」でログインして、以下のディレクトリ上にファイルがデプロイされていることを確認する。
ls /home/site/wwwroot/webapps/helloworld
以下のURLにアクセスして、Hello Worldページが表示できることを確認。 https://your-web-app-name.azurewebsites.net/helloworld